The South Korean manufacturer Kyung Dong Navien offers the Russian consumer a wide range of boilers of different capacities and performance variations. The equipment is adapted to the specifics of domestic communication networks and to local weather conditions. Reliable and functional units are reasonably in demand.
Mostly wall-mounted models buy from us, attracting with their compactness and economical consumption of gaseous fuel. The equipment presented for sale is Russified, so that setting up a Navien gas boiler is done without any problems. Moreover, it works "perfectly" in various modes.
We will talk about how to install a home heater to prepare the coolant and hot water. We will show you how to configure it depending on the period of the year. Here you will find valuable recommendations, following which you can significantly extend the working life of the boiler and prevent malfunctions.
Features of the functionality of Navien brand boilers
South Korean-made boilers with the Navien logo are not without reason leading in ratings based on the opinions of service technicians. They work flawlessly, meet the standards of the Russian Federation, have an impressive list of qualities that ensure comfortable operation.
The advantages that owners of gas heating units can take advantage of include:
- Frost protection. Stable operating system, eliminating the formation of ice plugs in pipes and unit. When the temperature in the surrounding area drops below + 10º, the circulation pump is automatically activated, when it drops from + 6º, the burner starts.
- Surge protection. Safety and continuous operation of the unit is ensured by a device that eliminates failures and stops. The SMPS chip embedded in the microprocessor (abbreviation for Switchet Mode Power Supply) is triggered by fluctuations in the power supply.
- Protection against low pressure in the gas pipeline. Units without disruption tolerate pressure drop in gas supply systems. Do not stop working even if the pressure is only 4 mbar.
- Use when water pressure drops. Boilers from a South Korean manufacturer work efficiently if the pressure of cold water at the inlet to the units drops to 0.1 bar.
- Unique heating technology. An external control panel equipped with a temperature sensor is attached to the equipment. The readings taken by him are instantly transferred to the boiler, which is turned on and off in accordance with changes in the temperature background within the object being processed.
In addition, Navien brand boilers are equipped with perfectly functioning automation and a wide range of security systems that interrupt heating of the coolant and sanitary water in the event of a brewing or a threatening situation.
Image Gallery
Photo from
Wall-mounted gas boiler brand Navien
Wall and floor gas models
Single and double circuit gas units
Gas equipment Navien ATMO
Gas boilers series Navien Deluxe
The range of gas boilers Navien Prime
Floor South Korean options Navien GA
Condensing equipment Navien NCN
To control the water pressure within the boiler, it is equipped with a pressure gauge. There is a safety valve that allows to reduce the pressure if it is higher than the norm regulated by the manufacturer.To prevent overheating, filters are installed for heating, and for water supply, and for gas.
Installation and Connection Procedure
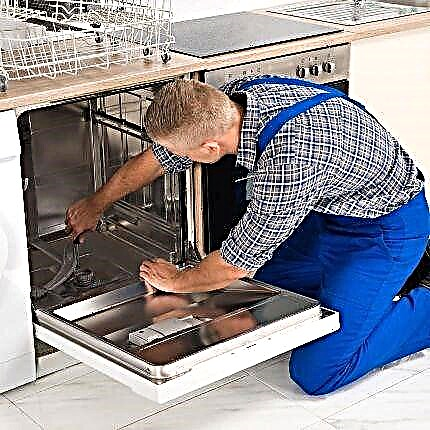
Immediately, we note that the installation and connection of any model of a gas boiler Navien, as well as its first start-up should be handled by a master from an authorized service structure.
Otherwise, the manufacturer will not fulfill the warranty. However, the owner should know how the process is carried out in order to control the work of the hired contractor.
Providing installation conditions
South Korean equipment for heating the coolant and hot water can process both main gas and liquefied gas mixtures. Available blue fuel options are indicated on the nameplate. It is fixed on the right side of the case.

Information on what type of gas is possible for processing in the Navien boiler can be found in the table on the right panel of the housing. Using gas that is not in accordance with the declared one may lead to failure of the unit or to an accident
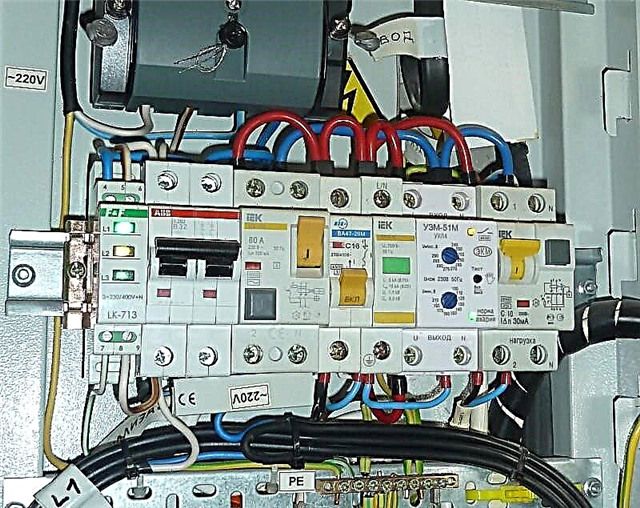
To connect the boiler, you will need to bring a power line to the location. It is impossible to connect the device to the mains through adapters or extension cords.
Requirements for the power line for the boiler:
- The power supply source for the operation of a boiler of this brand must have the following parameters: 220V, 50Hz. Deviations from these standards can result in either a fire or a drop in performance.
- It is forbidden to parallel the boiler to connect any electrical equipment to the source. Failure to comply may result in a short circuit.
- The outlet must be placed 30 cm from the heater body.
- The unit must be at least 60 cm from electrical appliances of all types.
- The boiler body must be earthed without fail.
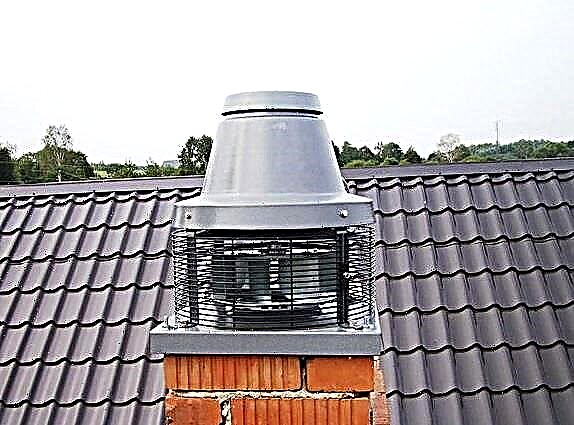
In a room intended for the location of gas equipment, a perfectly functioning exhaust and supply ventilation system should be organized.
The window should be with a transom, which can be easily opened for ventilation. The door below should have a ventilation gap or grille.
Image Gallery
Photo from
Multiple Outline Processing
Fail-safe ventilation
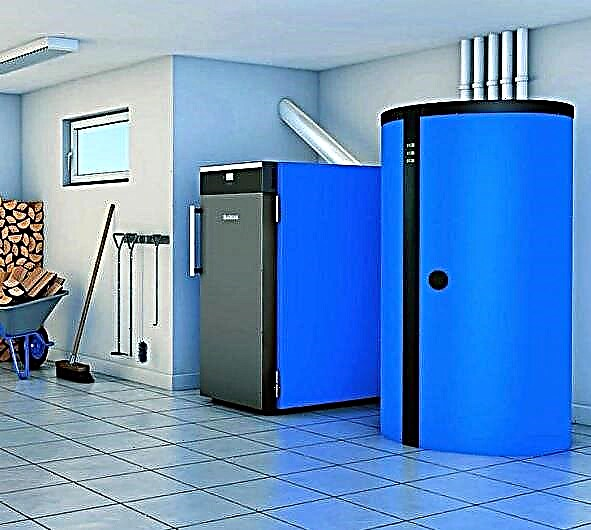
Installation of the floor unit in the boiler room
Wall model in the kitchen of a private house
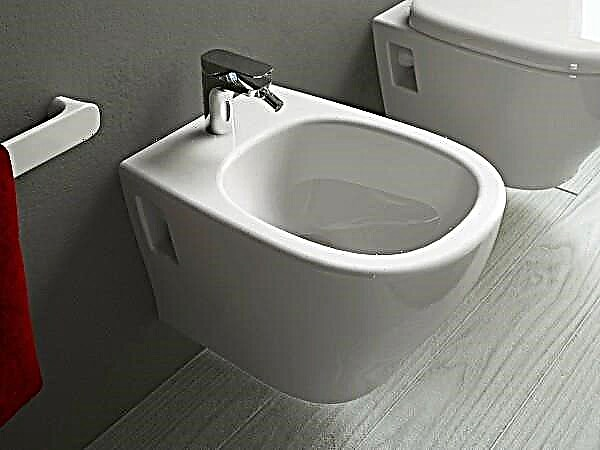
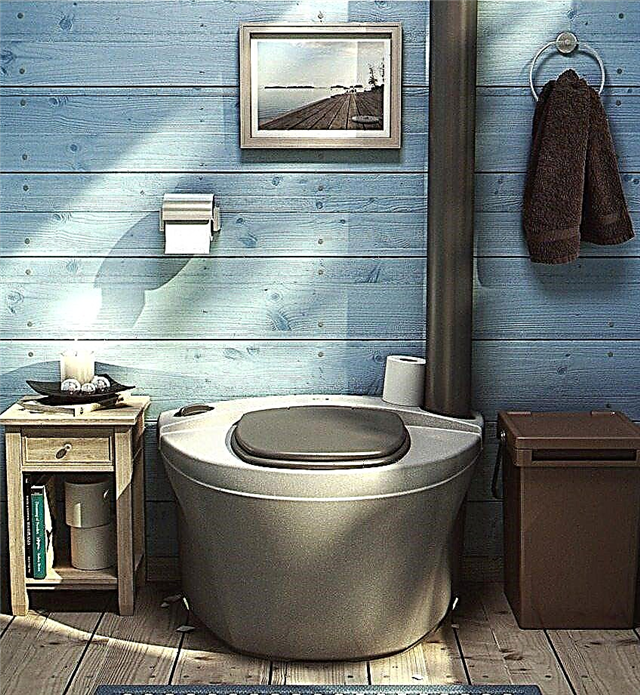
The location of gas equipment in rooms with a characteristic high level of humidity is not allowed: in bathrooms, in pools, in showers and bath houses. Dampness and insufficient air flow interfere with the normal operation of the boiler. In addition, it reduces its operational time.
Boilers must not be installed in open areas. After all, they are not intended for contact with atmospheric negative. It is forbidden to place where explosive and combustible substances, as well as bulk building materials are stored.
Choosing a place to place
In most cases, gas boilers mounted on the wall are located in kitchens or hallways, which have a window or only a window for ventilation.
To install floor models, boiler houses are set up, separated from residential and functional premises in the house. In either case, sufficient space should be provided for convenient maintenance and repair of the unit.
Image Gallery
Photo from
Wall mounted model
Recommended Contact Materials
Insulation between wall and boiler
Space for blowing the boiler body
Consider the rules for choosing a place for a wall-mounted gas device as the most common solution for our compatriots:
- Mounting is allowed on a wall made of fireproof building material. If the wall material is able to ignite and maintain combustion, the surface must be lined with a non-combustible finish.
- The unit must not be located near emergency exits and stairs.
- Between the opposite wall and the front panel of the gas equipment should be at least 0.6 m. A similar distance must be maintained between the boiler and any electrical appliances.
- 0.2 m should be left between the side panel of the housing and the closest structure or piece of furniture
- Between the floor plane and the lower edge of the unit hung on the wall should be 0.8 - 1.1 m.
To mount the wall model, it is desirable to find a place on the supporting wall. If the strength of the wall is in doubt, it should be strengthened. The boiler is fixed with anchor bolts.
Image Gallery
Photo from
The distance between the boiler and heating devices
Installation Violation
Indent from all types of electrical appliances
Rules for the location of the outlet
If there is a suspicion that the heater will make excessive noise during operation, it is recommended to use buffer substrates on the wall made of non-combustible material.
Connecting the speaker to communications
For the gas heater and heating water to work, the dual-circuit heating device must be connected to the communications. We have already talked about laying a separate power line. Everything should be done in accordance with the regulations of the PUE.

In order to deal with the nuances of connecting a gas boiler, you should carefully study its structural structure. Due to the fact that an inexperienced performer confuses a gas pipe with a water supply branch, a serious emergency may occur
Now it is necessary to bring branches to the boiler from cold water supply systems, gas supply and a return heating pipe. And it will be necessary to withdraw from it the supply line of the heated coolant, the pipe for supplying hot water to the mixers and the chimney.
All stages of connecting a gas boiler of the Navien brand must be carried out according to the scheme compiled in advance by the gas service with which the contract is concluded, and by the plumbers serving the house. It takes into account the technical features of a particular room and the recommendations of the equipment manufacturer.

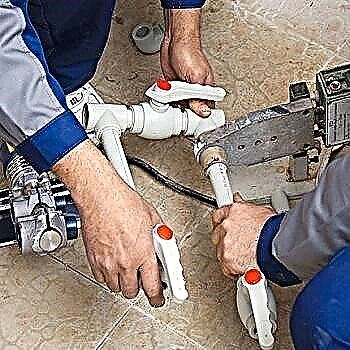
The connection of a gas boiler to communications should be handled by a representative of the organization with which a contract was signed for the supply of blue fuel, inspection and maintenance of gas-using equipment
After installation, all nodes of the connection of pipes transporting water must be checked for leaks. You need to test both heating and water supply lines. Inspections also require gas pipelines, which at the connection points are simply covered with soapy water to detect leaks.
Pipes that are not involved in the heating process are recommended to be insulated. It is partly a heating circuit and all branches of water supply. As thermal insulation, it is better to use foamed insulation that repeats the shape of the pipe.
All pipelines connected to the boiler must be equipped with taps to turn off the device in the event of a threat or breakdown. The boiler should be connected to the source of liquefied gas through a reducer, to the group of cylinders through a gas collector.

All incoming and outgoing communications from the boiler must be equipped with taps that are required to shut off the medium flow in case of equipment repair or replacement, as well as in the event of a threatening situation
Upon completion of installation operations, the boiler is first launched, which must be performed by a representative of the organization supplying you gas. Then, the setting is made according to your personal preferences and requirements for the indoor climate, as well as in accordance with the season.
Features of the first launch
The first start-up and commissioning operations are carried out by service center representatives who installed the boiler and connected it to communications. All actions are documented.
The owner of the equipment needs to keep these papers, asthey are written confirmation for the subsequent fulfillment of warranty obligations.

Before performing installation work, a diagram should be drawn up. The contractor must submit to the customer an estimate with the materials that he will purchase
For the first launch you need:
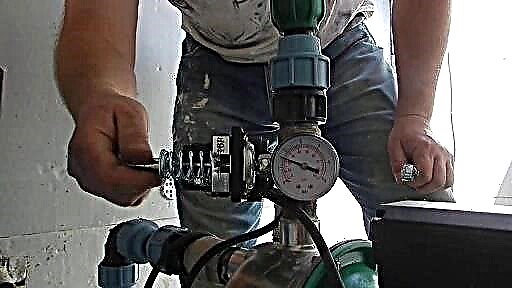
- Fill the boiler and the circuits connected to it. This is done through a make-up unit located on the bottom of the boiler, equipped with its own crane. They also use it, if for some reason the pressure in the gas boiler drops during operation.
- Watch the pressure during filling.. When the pressure gauge shows 2 atm, the valve should be shut off.
- Remove air plugs manually. Further, excess air from the unit will be automatically discharged, but for the first time after filling the heating circuit with coolant, they must be eliminated with a Mayevsky tap from each device, starting from the farthest.
- Replenish water in the heating circuitso that the coolant occupies the space that before it was occupied by not removed air.
- Bleed the circulation pumpmounted in a boiler.
After the above steps, you need to start the equipment by pressing the "Power" button. Then you need to start setting the priority temperature for the hosts.

If the error code 02 appears on the display after filling the communication systems and venting, you need to use a recharge tap to replenish the water. It is also needed to relieve water pressure in the circuits.
Configuration specifics
The complete set of Navien boilers includes a remote control panel. It is with its help that the setting is made. All commands and modes on the panel are registered in Russian, the buttons of all functions are accompanied by extremely clear graphic icons.
In the lower right corner of the remote panel there is a button that is used to enable / disable the unit. One press activates the boiler in the mode set by the owner. Pressing again will stop the heater.

To control the boiler and select the appropriate operating program, the gas processing equipment from Navien is equipped with remote controls
You can turn on heating with temperature control as follows:
- We find on the panel a button with an icon resembling a battery. Press until a similar symbol appears on the display.
- We select the priority temperature for us using the buttons with the “+” and “-” icons located in the center of the lower part of the panel. We increase and decrease from 40º to 80ºС in the most familiar way.
- We similarly denote the period during which the coolant will be heated.
Everything to the limit is simple. If the “battery” icon on the display is pulsating, then it shows the parameters that we just set. If it stops flashing, it means it displays the actual temperature at the moment.

In order to set the heating mode with the optimum temperature, you need to find the desired function on the remote control and set the priority temperature
To set the mode according to which the boiler will start / shut down, focusing on the temperature background in the room, we perform the following actions:
- We find on the panel a button with an icon resembling a battery. However, now we are waiting until the exaggerated image of the house with a “thermometer” appears.
- Again we return to the “+” and “-” buttons to select the temperature background in the room that is our priority. It varies in the range from 10º to 40ºС.
- The blinking house will show us the selected temperature, non-blinking - the real temperature parameter at this moment.
Upon completion of all the actions performed, you do not need to press any buttons to save, the settings we selected are automatically saved.

To select the desired water temperature on the remote control, find the function indicated by the shower head and set the desired value.Note! Changing the temperature while taking hygiene procedures by another person is prohibited
Choose the optimal temperature for the preparation of sanitary water as follows:
- We find the button for controlling the "Hot water" mode. We press it and wait for a pulsating image of a working shower head to appear in the upper right corner of the display.
- Again we use the “+” and “-” buttons in order to find the optimum temperature for us. It can be set in the interval +30 - (+60) ºС.
- We are waiting for the darling to finish flashing. This means that the boiler automatically saved the set level and switched to the operating mode in accordance with it.
If the unit is to be used only in the summertime or if it was purchased at all for the preparation of hot water, the “Hot water priority” function comes into play. The procedure for its selection is slightly different from the above method. The difference is that a double symbol will appear: a shower and a circle of three arrows.
The choice of this mode will cause the boiler to heat sanitary water even when it is not used. Those. the heater activates and prepares the water, and after 10 minutes it turns off if no one has opened the taps during this period.
If heated water is consumed, which is described by an open tap and a pressure drop, the boiler will always prepare water of a given temperature. He works to heat water only when there is a need for it. If you transfer the equipment to a different mode, then this automatically ceases to act.

Navien boilers can only work on heating hot water. To do this, they need to be switched to the “City water priority” mode (3-point diagram at the top) or “Outside the house” (two-paragraph diagram below)
You can transfer the Navien boiler to a mode that involves only heating the water, using another function. It is known to our compatriots under the name Winter-Summer. However, it’s right to call her “Out of Home”. The button for its selection is located in the lower left corner.
To set the period of continuous operation of the gas unit and turn off when there is no special need for it, there is a timer. They are controlled according to the absolutely simple scheme described above. The range of capabilities of the timer device is designed for an interval from 0 to 12 hours.
Recommendations for use
In order for the heat carrier and sanitary water heater to not be knocked down during operation and not to fail before the deadline, the operating rules must be strictly observed. They just need to be remembered and try not to violate the requirements agreed upon by the manufacturer.
If you do not need a heating system in the next two to three days, do not disconnect the equipment from the power supply. Together with the interruption of energy supply, the anti-icing system stops. It is not allowed that ice grows in the boiler or in the pipes connected to it.
However, if an ice jam has formed, do not despair. An effective and affordable tool for eliminating it is probably at your disposal. Use a home hairdryer and heat the pipes. And if he didn’t help, call the gas workers.
If in winter a long “idle” boiler without work is planned, all water from it and from the systems it processes must be drained. It is not necessary to create the slightest prerequisites for freezing contours. Believe me, the consequences can be not only deplorable, but also extremely dangerous.

The gas processing unit control panel must not be installed near air conditioners, electrical appliances, heaters. Otherwise, its built-in sensor will detect distorted data, and the boiler will not work correctly
Before switching on, try to constantly check whether the taps for the supply of water and the outlet of the heated coolant are open, as well as the supply of blue fuel. Do not forget that working on heating without the medium that the unit must process, it can burn out.
Never wipe the case of a working appliance with a damp cloth. Want to tidy up the Navien gas boiler, see how to turn it off. To do this, first interrupt the operation with the activation button on the remote panel, then disconnect from the power line.
Remember that the remote panel cannot be positioned so that it is involuntarily heated externally. You do not need to install it in a corner intensively shined by the sun or near a heating device. So all temperature settings will be lost due to the fact that the sensors record an unrealistic temperature.

Filters installed for the heating system must be cleaned regularly to maintain boiler performance at a height
Clean the heating system and cold water inlet filters regularly. Their clogging will force the unit to unjustifiably increase the heating power in an attempt to maintain productivity. And in the end, overheating and failure of important functional systems of the equipment will occur.
If there is a need to transfer the Navien boiler to use liquefied gas, invite a gas service officer. He will change the module with gas nozzles and reconfigure the boiler. Note that the translation work can be done independently, if you have no doubt that you can carry out them in a quality manner.
Image Gallery
Photo from
To transfer Navien to the consumption of a liquefied gas mixture, a priori configured and equipped to work on main gas, we buy a manifold with gas nozzles of the diameter recommended by the manufacturer of the boiler
We remove the front panel of the boiler body to "get" to the place of installation of the regular manifold with nozzles
We unfasten the connectors connecting the ignition device to the gas boiler transformer
To open the combustion chamber, first remove the horizontally installed gas supply pipe, then the overheating protection sensor
Remove the outer cover of the closed combustion chamber. Dismantle carefully, trying not to deform
Having unscrewed two fixing bolts on the sides of the regular collector, we remove it. We put in place a new one with nozzles of a smaller diameter and fix
Before installing a new manifold with gas nozzles designed to supply a mixture of liquefied gases, remove the o-ring from the former device and transfer it to a new manifold
On the control board we find a microswitch responsible for the use of a certain type of gas. Usually he is the fifth from below. Switch it to the right position
Step 1: Purchase a manifold with LPG nozzles
Step 2: Removing the front panel of the casing
Step 3: Detach the ignition device connectors
Step 4: Removing the gas line and overheating sensor
Step 5: Removing the Combustion Chamber Cover
Step 6: Replacing the manifold with gas nozzles
Step 7: Install O-Ring
Step 8: Switching the processor on the control board
Do not use it yourself and make sure that the invited master does not use used pipes to connect gas processing equipment. This is fraught with serious poisoning and damage to property in a very impressive amount.
Detailed instructions on connecting and commissioning a wall-mounted version of a gas boiler:
It is useful to know the specifics of installing, connecting and setting up a gas boiler both for independent home craftsmen and for hosts inviting plumbers with gas workers to perform the work described above.
Possession of information will ensure proper execution and worthy control of all actions. Then the boiler will work perfectly, will not create problems and will last an extremely long time.