A bidet is an extremely useful and convenient plumbing fixture. And if one of the members has special needs due to health problems, such a device is simply irreplaceable. But the cost of plumbing of this type is not for every family budget “tough”.
Fortunately, installing a bidet is a relatively simple procedure that even a novice plumber can handle. We will tell you in what sequence this work is carried out, what norms and requirements the performer needs to observe. As an alternative, the article describes the installation of a bidet cover.
What are bidets?
Bidet is a sanitary ware designed for personal hygiene. Externally, the device is very similar to a conventional toilet, and technically it is a low hanging washbasin.
It is also connected to the sewer, but instead of a tank there is a faucet or fountain. There are floor-mounted bidet models and a suspended version. The former are mounted on the floor, and the latter are hung on the wall.
When choosing a bidet, one should take into account not only the installation method, but also other design features. For example, a mixer can be either a conventional two-valve or a single-lever, with a ball mechanism. The latter is considered more convenient.

Bidet is a small device for personal hygiene, which can be extremely convenient for sick and elderly family members
The spout is designed so that the stream of water can be directed upward at a suitable angle. In some models, the spout is completely absent, the water beats from the bottom of the bowl with a small fountain, the direction of which can also be regulated. The design of the product should be chosen in accordance with the style of plumbing, which is already available in the bathroom.
There are retro models of modern bidets, and products made in the trendy hi-tech style. It is equally important to consider the size of the plumbing fixture, especially when it comes to a small bathroom. There should be some space around the bidet to make it easier for the bathroom visitor to use.

Hinged bidet models are compact and easy to clean. Very effective look toilet and bidet, made in the general style
Mounted models look very compact, but for their installation you should use a special installation, which should be placed in a niche behind the bowl, or behind a special false panel. To accurately take into account all these points, you should carefully measure with the tape measure both the space intended for the installation of the bidet and the device itself.
An excellent alternative to a free-standing bidet is an intelligent toilet, which practically combines the functions of both varieties of plumbing in one housing:
Image Gallery
Photo from
Multifunctional electronic toilet
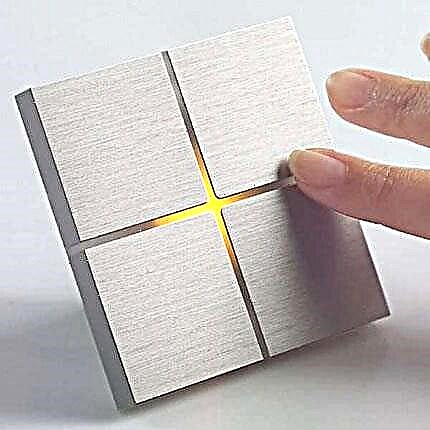
Control panel for plumbing fixture
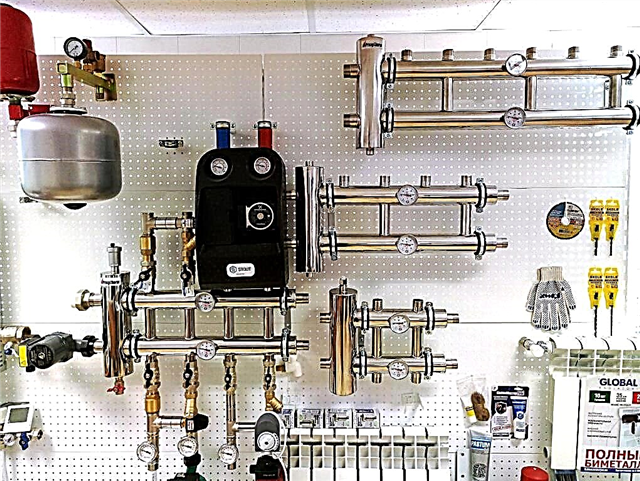
Instantaneous water heater in construction
Extra hygienic shower on the wall
Mounting the floor model
So, the place is selected and plumbing acquired. Before installation, you need to check the complete set of the device once again, and also verify the integrity of the product. Chips and cracks in the bowl are not allowed, even if they are hidden after installation.
For installation, you may need the following set of tools:
- drill and / or punch;
- drills for working on concrete and ceramic substrates;
- set of wrenches;
- adjustable wrench;
- material for sealing threaded joints;
- silicone based sealant designed for use in wet conditions, etc.
Figuring out how to install the floor model of the bidet, you need to choose the right place for installation. In this case, you need to accurately measure the distance from the device to the place of connection to the water supply and sewage.
Put the bowl on the base and mark the places on which the fasteners will be mounted. Then, holes are made in these places, the diameter of which corresponds to the dimensions of the dowels made of plastic.

Before installing the floor version of the bidet, mark on the floor, marking the places for fasteners, and then drill holes
For drilling ceramic tiles, it is recommended to use a special pen drill. The dowels are placed in the holes, put the bowl on top and fix it with fixing bolts. In this case, rubber gaskets are used so as not to damage the ceramic surface of the product.

Floor-standing bidet models are installed in approximately the same way as the toilet: first they fix the bowl, then they connect the device to the water supply and sewage system
The force when tightening the bolts should be moderate, otherwise the ceramics may simply crack. But you should not tighten the fasteners too loosely so that the position of the bowl is reliable. For additional fixation of the product to the floor, silicone sealant is used, which greases the gap between the lower edge of the bidet and the floor.
Now you can proceed to install the mixer. Depending on the model, it is mounted either on the side of the bowl or on the wall. Typically, the manufacturer supplies complete instructions with the mixer, as well as all the necessary hardware. Check the availability of these elements should be even when buying a bidet.
To install a wall-mounted faucet, you may need to shred the wall next to which a bidet is installed. These works are best done before installing the bowl, so as not to damage it during the formation of the recess. Along with the markings for fasteners, markings are also made on the wall under the mixer.
Then the bowl is removed and a hole is made in the wall. After that, the floor surface must be cleaned of debris formed, and then drill holes for the fasteners of the bowl. With the mixer, which is installed on the side of the bidet, everything is easier, a special hole is usually already provided for it.
The mixer is installed in the right place using a rubber gasket and fixed with a clamping nut, which must be carefully tightened with an adjustable wrench. After that, cold and hot water is supplied to the device, it is important not to mix up the valves or inlets, depending on the model of the mixer.

A modern ball mixer is considered more convenient for a bidet, but models made in retro style usually use two-valve devices
To connect a bidet to a water supply system, a flexible braid in a metal braid is usually used. It is important that these hoses are not too long, forming unnecessary loops. But even worse, if the flexible eyeliner is too short and tense. This is an invalid error while installing a bidet.

When connecting a bidet to the water supply, it is recommended that a shut-off valve be installed so that it is possible, if necessary, to turn off the water entering the device
To connect the hoses to the pipes of cold and hot water, you will need to insert or install tees. It is recommended that shut-off valves be placed in front of these tees so that it is possible to block the water flowing on the bidet. If you need to repair the product, you do not have to block the entire apartment water supply.
Connection to the plumbing system is usually made using threaded connections. Each such connection must be carefully sealed with linen thread, FUM tape or other suitable material.
Here, novice plumbers make two mistakes: they use too much or too little sealant. If the material slightly protrudes outward after screwing the thread, its quantity can be considered optimal.
It remains to connect the bidet to the sewer system. Be sure to install a siphon. You will also need a rubber cuff adapter and corrugation. First, a siphon should be installed at the exit of the bidet.
In this case, a special rubber gasket is used. Almost all bidet models are equipped with an overfill protection device. During installation, it is necessary to monitor the integrity and proper operation of this unit.
Then a corrugation is attached to the siphon. Its second end is mounted to the sewer pipe, and a rubber sleeve serves to seal this connection. On this installation of the floor bidet can be considered completed. Turn on the water and check all joints for leaks.
Features of installing a suspension device
Installation of a compact suspended model begins with the installation of the installation, to which the device itself is then attached. In this case, the weight of the device is distributed both on the frame and on the wall to which it will be fixed. Often, the partition between the bathroom and the toilet is made of light materials, such as plasterboard and profile.

Choosing a place to install a bidet, you should take care of a sufficient amount of surrounding space so that the visitor to the bathroom is comfortable
It is not recommended to mount the installation to such a wall, since it can simply collapse under the weight of the plumbing. Most often, a small niche is made for the frame in the wall. Such a recess should be slightly higher and deeper than the dimensions of the structure for which it is intended. If the bathroom already has a finished niche of suitable sizes, you can use it.
It also happens that for some reason it is impossible to make a niche. In this case, the installation is simply mounted against the wall, and then hidden behind a false panel, for example, from drywall, to give the structure a complete and aesthetic appearance.
Before installing the installation, it is necessary to bring to the place of installation of the pipe cold and hot water, as well as the sewer pipe. The outputs of these elements should also remain available for further connection to the bidet.
The frame is supplied disassembled; it must first be assembled in accordance with the manufacturer's instructions. At this stage, it is usually possible to adjust the height of the suspension of the bowl so that the device is convenient to use.
After that, the installation is fixed to the floor and wall using fasteners. First, markup is performed, then the holes are drilled, after that the frame is fixed in the correct position.
After assembling the frame, the mounting points are marked and the optimal height of the support frame and supporting parts is selected:
Image Gallery
Photo from
Step 1: Trying the structure before marking
Step 2: Choosing the height of the bidet and the upper bar of the frame
Step 3: Marking the mounting points of the installation
Step 4: Choosing a drain position
Step 5: Securing the Release with a Clamp in the Frame
Step 6: Marking the mounting points of the installation on the floor
Step 7: Drilling Mounting Holes
Step 8: Preparing the Installation for Mounting
During the assembly and installation of the frame, the building level should be regularly used. Misalignment in the position of the installation elements will lead to improper positioning of the bidet and may soon lead to incorrect operation of the device and its breakdown.
If you need to dismantle the installation for repair, the cost of fixing the problem can be very large.
If the frame is installed correctly relative to the horizontal and vertical, you can sheathe and decorate the niche in which it is located. Of course, there must remain elements on the outside on which the bidet bowl will be hung. These are special long studs that are inserted into the corresponding holes on the frame and fixed to the wall.
Image Gallery
Photo from
In the holes drilled on the wall and in the floor, we drive the dowels. We return the installation and tighten the screws through it
We mount the installation in the upper part to the wall. Once again we check the vertical / horizontal construction level
We fix the retractable support legs, with which they changed the installation height and chose the optimal bidet position
We bring the sewer outlet to the sewer outlet and connect, ensuring tightness
We install water sockets, observing the standard distance between their centers. Put seals on top and temporarily seal them with tape
We lay water lines to water outlets. If there is less than 10 cm between them, we put on them a polypropylene insulation for pipes of the corresponding diameter
We unstick the tape from the water sockets. We connect the shutoff valves necessary for the case of repair work to the hot and cold water supply lines
To hang plumbing in the installation, we twist steel rods. We turn on the previously blocked water, check the operation of the taps, opening them, and the work of the outlet, pouring water into it, then turn off the communications again
Step 9: Fixing the installation for the bidet with screws
Step 10: Attaching the Top of the Support Frame
Step 11: Locking the Height of the Extendable Feet
Step 12: Connect the sewer to the outlet
Step 13: Installing Water Outlets with Seals
Step 14: Laying the domestic hot water and hot water supply lines
Step 15: Installing the taps on a hot and cold branch
Step 16: Installing Steel Rods for Bidet Mounting
When hanging the bowl on metal studs, a rubber gasket is usually used, which protects the ceramics from damage. An alternative to rubber can be a layer of sealant.
It must be applied to the surface of the fasteners, then wait for the composition to dry. After that, you can hang and fix the bowl. However, the use of rubber gaskets is considered more reliable and convenient.
After the installation for the mounted bidet is installed, the wall is decorated, but the conclusions for connecting the sewer and water supply should remain outside.
Image Gallery
Photo from
Taking into account the thickness of the lining, the finish, the location of the bidet and other suspended plumbing, we construct the frame for the wall from plasterboard plates
We build a false wall from plasterboard plates, fix them with self-tapping screws for GVL to metal racks. In the plate that closes the installation, we pre-drill the technological holes for the release, water sockets and metal studs for hanging a bidet
On the false wall, we finish the selected material, not forgetting to drill holes for water outlets, sewer outlet and metal studs in it
In a bidet, we install a drain pipe with a siphon and in this form we try on the device at the installation site. Note the excess length of the drain pipe, cut it with a hacksaw
We put and tightly fix the drain pipe in the bidet. In the assembled form, the device is hung on the studs, while not pushing it close to the wall
We connect the bidet mixer with flexible eyeliner to a hot and cold water branch
We check the position of the bidet with a building level, if necessary, align the device. We twist the fixing nuts onto the studs and close them with decorative caps
We open the domestic hot water and cold water lines that were blocked before finishing work. We check the operation of the mixer and the tightness of the connection nodes. After making sure of the quality of work, we proceed to operation
Step 17: Frame device for the false wall
Step 18: Wall Covering with Plasterboard Panels
Step 19: Finishing the Bathroom
Step 20: Fitting the drain pipe with a water seal
Step 21: Install a bidet with a trimmed drain pipe
Step 22: Installing and Connecting a Bidet Mixer
Step 23: Aligning and fixing the bidet with screws
Step 24: Testing the Bidet Before Commissioning
The bowl suspended on the studs is fixed with clamping nuts, which must be carefully tightened so as not to damage the ceramic surface of the sanitary ware.
Further installation of the bidet is approximately the same as when installing the floor model. First install the mixer, then connect the hot and cold water using flexible hoses.
The requirements for sealing all threaded joints remain the same as when installing any other plumbing: sealing is mandatory. It is recommended to perform it even in cases where sealing gaskets are used.
The connection of the mounted bidet to the sewer system is also carried out only through a siphon. A rubber cuff adapter is placed between the siphon and the sewer opening. Now you need to empty the water and check the operation of all nodes, make sure there are no leaks. If everything is in order, you can perform the necessary finishing work.
Something about the bidet lid
If there is absolutely no place to install a bidet, and it is very necessary to use this good of civilization, it makes sense to consider the option of acquiring a lid-bidet or a bidet-attachment. This is an electronic device that looks very similar to the lid for the toilet, but is equipped with a number of additional functions.

An electronic toilet lid is an excellent alternative to traditional bidet models, especially if there is not enough space for new plumbing
The bidet cover is installed directly on the toilet. This device needs water and power. Of course, there is no need to connect to the sewer. Electronic devices are equipped with a microprocessor and a control panel, with which you can set the appropriate temperature and water pressure.
Such products are also equipped with a function of blowing warm air, the temperature of which can be set at an acceptable level. Management is carried out remotely using the remote control. Some models include a water filter and purification of the incoming air.
Among other useful options it makes sense to note:
- automated dispensing of liquid soap;
- antibacterial seat cover;
- various spray modes (massage, pulsation, etc.);
- air freshener;
- seat heating;
- the presence of a timer;
- automatic nozzle cleaning system, etc.
High-quality bidet covers are very convenient to use, they are in no way inferior to the traditional versions of this plumbing device, and at the same time they make it possible to solve the problem of lack of space for an additional device.
Such an electronic device needs to be grounded. It is recommended to bring a separate cable from the shield to power the bidet cover, as well as install a residual current device.
Instead of a full-fledged bidet cover, you can use its simplified version - a bidet-overlay, the installation of which is much easier than a stationary version of this type of plumbing.

The device replacing a full-fledged bidet is equipped with two flexible eyeliners. The length of the bellows hose for hot water is 2 m, for cold - 65 cm. Two tees for 9/16 ″ -1/2 ″ are attached to the device
The procedure for installing and fixing the lining is as follows:
Image Gallery
Photo from
We remove the seat with the lid from the toilet by unscrewing the fixing bolts from below. This device is not disassembled, but simply removed so far to the side
We try on the device to the installation site. Focusing on the rim of the toilet, we choose a position so that the nozzles move freely without touching the protrusions of the plumbing
If the nozzles, while moving up / down, touch the rim of the toilet bowl, we shift it a little forward
We put the toilet lid in its original place, but already on top of the lining. We pass the mounting studs first into the holes on the lining, then the toilet
After installing the seat with the cover, we once again check the position of the device, which should be strictly centered, and the position of the seat itself
Align the device, check whether the seat cover opens freely. After verifying normal operation, we fix both devices by tightening the mounting nuts on the seat studs under the toilet
Now we connect a flexible eyeliner to the control device: a short hose to the cold water inlet, a long hose to the hot water inlet
We connect the opposite edge of the cold water hose to the flushing tank, the second hose - through the stopcock with a tee to the DHW branch
Step 1: Preparing the toilet to install a bidet pad
Step 2: Trying on the pad to the installation site
Step 3: Correcting the position of the device if necessary
Step 4: Installing the toilet lid over the pad
Step 5: Correcting the position of the pad after installing the cover
Step 6: Locking the instrument and fixture
Step 7: Connecting the control device
Step 8: Connecting the hoses to the tank and DHW
A very simple alternative to a bidet is a hygienic shower with a small watering can. It is connected to the pipes of hot and cold water through a mixer, and a watering can is suspended with a hose of a suitable length near the toilet. Of course, this is not as convenient as a traditional bidet or an electronic analog in the form of a cover, but this option will cost relatively cheap.
Detailed instructions for installing the outdoor bidet model can be found here:
This video demonstrates how to install a mounted bidet:
An overview of the operation and installation of the electronic bidet cover is shown in this video:
To paraphrase the classics, we can say that a bidet is not a luxury, but a necessary hygiene product. Installing the device is not so difficult, you just need to follow the instructions exactly and follow the basic rules for installing plumbing fixtures.
Please write comments in the block below. Tell us how the bidet was installed in your country house or city apartment. Ask questions, share useful information, leave posts with your opinion and photos on the topic of the article.